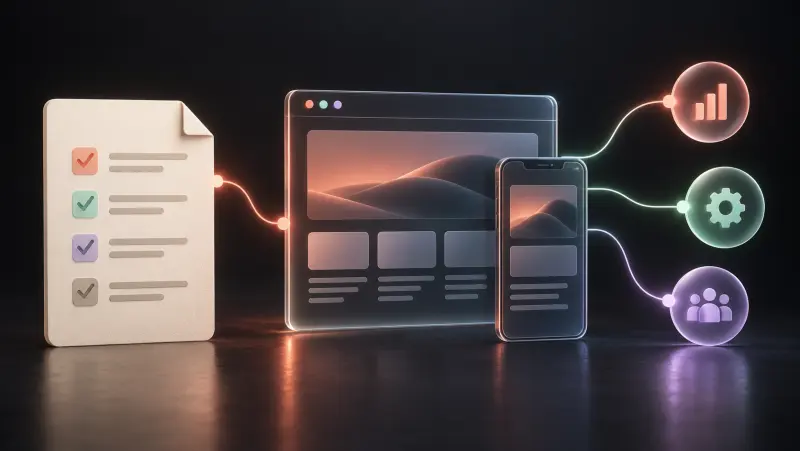

A useful website contact form asks for the information your team needs to respond, explains what happens next and helps visitors recover when something goes wrong. Before accepting a new form, check the complete enquiry journey: entering details, correcting an error, receiving a clear confirmation and finding the enquiry at its agreed destination.
This website contact form checklist is for businesses briefing or reviewing a service website. It helps turn “add a contact form” into decisions a supplier can build and demonstrate. Your appropriate fields and delivery arrangements depend on how your business handles requests.
1. Define the enquiry and the next action
Start with the question the form should answer. Is someone asking about a service, requesting a quote or reporting a problem? Those journeys may need different information and different destinations. A general enquiry form should not quietly become an application, a booking system or a support ticket process without a clear reason.
Write a one-sentence purpose, then name the person or team that will read the request. Describe their next action: reply by email, arrange a call or ask for a project brief. Work backwards from that action to decide what is necessary at first contact. If nobody uses a field to route or answer the enquiry, consider removing it or collecting it later.
Set an honest expectation beside the form. Say what kind of request it accepts and how the business will respond. Include a response timeframe only when your team can support it. A form that says “Book now” should not merely email an unconfirmed request; its button and confirmation should describe what actually happens.
Separate first contact from qualification
A visitor may not yet know their budget, schedule or technical requirements. Decide which unknowns genuinely prevent your team from responding. Where a choice helps route the enquiry, offer an appropriate “not sure yet” option. Keep detailed discovery questions for a later conversation when a visitor needs more context to answer them.
2. Give every field a reason to exist
Use the worksheet below when reviewing the proposed form. It is an example for an email-led service enquiry, not a universal minimum or an instruction to collect all six items. Mark each chosen field as required or optional, and write down how the receiving team will use it. Make those choices visible in the interface.
| Possible field | Reason to include it | Question before making it required |
|---|---|---|
| Email address | Give the team a route for replying | Is email the promised response channel? |
| Name | Address the person in a reply | Does the first reply really require a full legal name? |
| Message or project summary | Understand the request in the visitor's own words | Would a short prompt help someone begin? |
| Service choice | Route requests to the right team | Can visitors choose “not sure” or describe another need? |
| Telephone number | Arrange an agreed phone response | Can the team respond without calling? |
| Budget or timing | Identify practical project constraints | Can these details be discussed after first contact? |
Review restrictive rules as carefully as the field list. Names may contain spaces, accents or punctuation; international telephone numbers may include a country code. Do not reject plausible information because a prototype was tested with only one example. Ask the supplier to explain length limits and permitted formats in ordinary language.
For a general enquiry, avoid requesting passwords, payment details or sensitive documents. If uploads are necessary, scope them explicitly with the responsible technical team, including accepted types, size limits, storage and access. A file field adds responsibilities that are absent from a simple text enquiry. Explain the relevant data handling through the site's appropriate privacy information rather than burying operational details in a vague checkbox.
3. Make labels and mobile entry easy to use
Each field needs a clear label that remains available while someone types. Placeholder examples can help explain a format, but disappearing placeholder text should not be the only label. W3C's forms tutorial recommends labels, instructions, appropriate structure and feedback to make forms easier to understand and use. Ask for those fundamentals in the brief instead of relying on visual polish alone.
Use specific labels such as “Email address” and “How can we help?” rather than internal business terminology. Put useful instructions before the action they explain. If a message has a length limit or a phone field expects a particular format, show that information where it is needed. Required and optional status should be understandable without interpreting colour alone.
Check the proposed form on a narrow phone screen. Labels should wrap cleanly, fields should fit within the page and the on-screen keyboard should not make the next action impossible to reach. Ask the developer to use appropriate input types and autofill hints. MDN explains how the autocomplete attribute describes expected information to the browser. Actual autofill behaviour still depends on the browser and saved user information.
Use the keyboard to move through every control in a sensible order, including any checkbox, help link and submit button. The current focus should be visible. Include a screen-reader check in the agreed accessibility review so labels and feedback can be assessed beyond their appearance. Passing a visual review or a single automated score does not establish complete accessibility.
4. Plan errors and recovery before the happy path
Ask to see a missing required field, an incorrectly formatted email address and a submission that cannot complete. These are different situations and should not all produce the same “Something went wrong” message. Field feedback should identify what needs attention and give a useful correction, such as asking for an email address in the expected format.
After an error, keep information that the person should not need to re-enter, where the implementation safely allows it. Make the problem easy to find without relying on a red outline alone. W3C's guidance on form notifications explains clear overall and inline feedback, including confirmation of success. A reviewer should check that feedback is available to assistive technology as well as visibly displayed.
Agree what happens during a slow response. The interface should communicate that submission is in progress and handle repeated activation deliberately. If the outcome is uncertain, avoid instructing visitors to keep clicking until something happens. Give them an understandable next step and an alternative contact route appropriate to the business.
Browser checks help users correct input quickly, but they are not the entire implementation. MDN distinguishes client-side validation from the server-side checks that are also needed. Ask the supplier to describe the server validation, abuse protection and error handling included in your scope. Do not treat a required-field asterisk or an email-format check as proof of security.
5. Separate confirmation from delivery and response
A successful screen should describe the stage the system actually reached. Acceptance by the form service, arrival in a team inbox and a human response are separate events. Ask the supplier what must happen before the website displays success, where the request is retained or forwarded, and how the responsible team discovers a delivery problem.
Choose the destination deliberately. Record the mailbox or system, the business owner of that destination and a backup contact for operational issues. Confirm who maintains the account and any subscription it depends on. If enquiries are copied to more than one person, agree who responds so a visitor does not receive conflicting replies.
Decide whether a visitor receives an acknowledgement email. If one is included, review its subject, sender, language and wording as a separate deliverable. It should not promise a confirmed appointment or agreed project unless the system has actually created one. Keep any later marketing journey separately scoped from the immediate response to an enquiry.
A hypothetical consultancy enquiry
Imagine a consultancy that replies by email. It chooses an email field and a short message, with an optional name and service choice. The preview identifies an invalid email format clearly and retains the message after correction. In an agreed test environment, the accepted request reaches the designated team destination and the confirmation explains the next step. This illustrates an acceptance method, not a reported client result.
6. Agree a safe acceptance test with evidence
Write a small test plan before launch. Name the preview or test environment, approved test addresses and intended destinations. Use invented test content and coordinate any test messages with the receiving team. Do not submit real customer details, create unintended appointments or send surprise messages merely to see whether the button works.
Cover a valid enquiry, missing required information, a format error, a slow or failed response and repeated activation. Include long text, accented characters, keyboard navigation and a narrow mobile viewport. For a multilingual form, review labels, validation, confirmation and any acknowledgement in each supported language; translating the page heading alone does not finish the journey.
Record what each check actually proves. A screenshot shows displayed feedback. A test receipt at the agreed destination shows that particular request arrived. Neither proves every future message will be delivered or answered. Save the tested version, date, scenario, result and any unresolved issue so the launch decision rests on evidence that the team can revisit.
Give every unresolved problem a responsible person and next action. Agree which issues block launch, such as a missing response route or a misleading success state. Document how to report later failures and who checks the destination after account or integration changes. This is a practical operating agreement, not a requirement to buy a particular monitoring product.
7. Put the whole journey in the website brief
Your form brief should now include its purpose, fields, response channel, labels, error states, confirmation wording, delivery destination and acceptance checks. Add those decisions to the website project brief before design and development begin. If requests need to enter a sales workflow, use the separate CRM automation guide to plan that downstream process.
Before accepting delivery, confirm that a visitor can complete the intended journey, recover from an error and understand the next step. Verify the agreed destination using a coordinated test and keep the operating notes with the website handover materials. A working form includes both a usable interface and a clear business responsibility for the enquiry.
Digital Studio's website service starts at EUR 2,190 for a one-off build of up to five pages using supplied content, with responsive design, SEO foundations, one lead form and launch on your domain. Conditional forms, uploads, booking flows, CRM connections and ongoing monitoring should be discussed and agreed for your project; this checklist does not add them to the published package. Describe your website and enquiry needs so the required journey can be scoped before work starts.